Thursday, December 30, 2010

Double-sided napkins

My, what lovely napkins you have!
Oh, yeah...I made them. 
Wazzup?!

They match pretty much the entire rainbow of FiestaWare. 

Oh, did I mention they're double-sided?
They are. 
And the other side matches all the FiestaWare, too. 

Stripes? Flowers? How's a girl to choose?! 

Baby blue thread on top and yellow on the bottom, so the seams don't show (genius!).

I sent these to my sister-in-law for Christmas and I was a little sad to see them go. Once I figured out what I was doing, they nearly made themselves. All I had to do was follow the instructions in this tutorial: click, and this tutorial: click. Now that I know how easy and fabulous these napkins are, our everyday cloth napkins are suddenly looking like they should probably be donated to make room for something new. Life is simply too short for dreary napkins.

Tuesday, December 28, 2010

Cabinet hardware

After half-heartedly searching for cabinet hardware, we finally stumbled on some we like. Hooray! Impatient, as always, I decided to conquer the installation of said hardware while Mr. Mallard was at work. It was pretty simple and it makes a huge difference in the look of the kitchen.

Before

 After!
I was going to do the drawer pulls, too, but the screws that came with the pulls aren't long enough to go through our fancy drawers, so we'll be taking a field trip to the hardware store later this week. 

This little dealy made all the difference. Just figure out where you want your knobs and you can make sure they are in the same spot on every cabinet. It came with a drill bit, as well as a drawer pull template, and those are both super handy, too. 

Upper cabinets before 

After
Pretty darn great, considering it took less than an hour and the knobs were less than thirty bucks. 
 Blah

Huzzah!

Trick #1: Put an old cookie sheet under the cabinet you're working on and it will catch all the little wood bits, thereby keeping all that gunk off your counters and floors. 

Trick #2: Use the right tool for the job. I had to climb up just a tiny bit to get the cabinets above the range and opted for the step ladder, rather than a chair. By using the ladder, the Biggest Girl sees me getting where I need to be, but she doesn't learn to climb on the dining room chairs. Ha! Brilliant, eh? 

Trick #3: Keep an eye on the quiet, cooperative child. He/she may appear to be the most amazing kid ever when, in fact, they are quietly pushing every flat thing in the kitchen under the range while you work on the upper cabinets. Awesome. Guess it's time to clean under the range now...

Tuesday, December 21, 2010

Cream of Potato Soup

Adapted from Moosewood Restaurant Daily Special
Serves 6-8
Printable recipe here: click

1 1/2 cups diced onions
1 1/2 cups diced celery
1 large clove garlic, minced
1 tsp salt
1 Tbsp canola, olive oil, or butter
3-4 cups cubed potatoes
3 cups vegetable or chicken stock
1 tsp dried dill
1 cup milk
2 Tbsp nutritional yeast
1-2 cups shredded sharp cheddar

In a large pot, heat the oil (or butter) over medium-high heat and add onions, celery, garlic, and salt. Saute until celery is just tender--about 5 minutes. Add the potatoes, stock, and dill. Cover and bring to a boil. Reduce heat and simmer, uncovered, until the potatoes are soft--10 minutes or so. Stir in milk. Using either a food processor or hand blender, puree about half of the soup. Add cheese and stir until melted and evenly distributed. Serve hot with a side of steamed vegetables.

----------

This recipe should be subtitled "How to Use the Rest of a Bag of Potatoes". I used russets, but any potato would work. You don't have to peel the potatoes. I peeled the russets out of habit, but would have left the peel on Yukon Golds or reds. Using veggie stock will make it a vegetarian soup (durh). Add a little more nutritional yeast if you're skipping the cheese and you'll still get a cheesy flavor out of the soup. And speaking of cheese...I used sharp cheddar, but it's great with pepper jack (add a chili to the onion and celery for an extra kick). Any cheese that melts well will do.

The steamed vegetables were a bit of an epiphany. With no lettuce in the fridge and a very strong desire to contain the meal in a single bowl, we steamed up some broccoli and a new tradition was born. Gone are the days of the cliched soup and salad! Any steamed vegetable would be great with this soup, so grab your favorite and join the We've Had Plenty of Green Salads Thankyouverymuch Club.

Monday, December 20, 2010

Have buns, will travel

Before we travelled to the East Coast this spring, I scoured the intraweb, looking for tips from families that travelled with cloth diapers. I came up pretty empty-handed. Most cloth diaper users just gave up and used disposables when they were going to be away from home for more than a night.

That's not encouraging.

In the face of so many wusses, we became more determined to use cloth for our nine-day adventure. Failure was just not an option. Of all the reasons we do cloth diapers, producing no landfill-bound waste is right up there at the top, so the thought of doing disposables--even for a week--was not something we were taking lightly. It was a repulsive thought, to be honest, and we could not convince ourselves that any amount of convenience would be worth putting our ethics aside.

So, we took a deep breath...and then we totally rocked a cross-country cloth diaper adventure!

During the "maybe-we're-being-too-stubborn" period of this process, we bought a package of g-diapers. They fit nicely into the very awesome Bumkins diaper covers we love and they are, in theory, flushable. Well, Matchbox cars are technically flushable, too, and a little research revealed that most municipalities do not want you flushing anything (and I mean anything) but toilet paper and your...umm...business. So, the g-diapers plan was a bust. Can't flush them, which means you have to add it to the landfill and that doesn't work for us. Not to mention our test run was a dismal failure and the Biggest Girl woke up in a puddle.

Cloth it is, then.

The night before we left, we put all the diapers and wipes in the wash and scrubbed the diaper pail--the last thing we wanted to return to was a gnarly, moldy, stinkpot diaper pail. Though we were not thrilled with them, the Biggest Girl slept in a g-diaper so we could wash the others. We disconnected the diaper sprayer and packed it in a ziploc bag that was very clearly marked "diaper sprayer". Once everything was dry, we packed the diapers, covers, wipes, and sprayer together in the Biggest Girl's suitcase and we were good to go.

We did a g-diaper for the drive to the airport and changed her into cloth once we got through security. She remained in cloth diapers until we washed all the diapers again the night before we headed back home. In all, we used a total of four g-diapers for the whole trip. The rest of them are still sitting in the closet, waiting to be peed on and composted one of these days.

Once we made it to my mother-in-law's house, we hooked up the sprayer and used a 5-gallon bucket with a lid as a diaper pail. We brought an extra wet bag--just to make sure we were prepared--but never needed it. We just went about our days like we normally would, changing buns, rinsing diapers, and trying to control our curly hair in the springtime humidity of the East Coast.

On the flight home, we did cloth the whole way. We didn't have any difficulty getting through airport security and, since the diaper bag doesn't count against your carry-on allowance, we had plenty of diapers to get us home. We did use a tiny sample pack of disposable wipes on the way out, but switched to cloth wipies on the way home. You can get them wet in the restroom and, while they won't have any soap on them, they'll do the job just fine.

Riding high on our success, we did cloth for a two-night trip to Seattle a few months later. I gave the diapers a dunk in the toilet at the hotel, rinsed them in the sink, wrung them out and tossed them in the diaper pail (we brought it along since we drove). Before we headed home, I put about an inch of water and a dash of Dr. Bronner's in the tub, dumped the diapers in the tub, swished 'em around, rinsed them, wrung them out, and hung them all over the bathroom so they could dry a little. The next morning I tossed them all back into the pail and we drove home in the hot summer sun without even a wiff of diaper pail.

Bottom line: traveling with cloth diapers is just as easy as traveling with disposables. Given we didn't have to surrender our diapering integrity, I'd say it's even easier than using disposables. A little planning and a little determination can save you money and keep you from having to compromise your ideals. Plus, it's kind of fun to be belligerent sometimes. We could have given in and done disposables--it seems like everyone else did--but where's the fun in rolling over? Think of it as a chance to show the naysayers it can be done. Think of it as an exciting challenge, rather than a bothersome burden. Think about how marvelous you'll feel when you get home and realize you've accomplished more than most people even attempt (go you!). It might seem daunting to take your buns on the road, but we did it. So can you. And your baby's buns will be so glad you did.

Friday, December 17, 2010

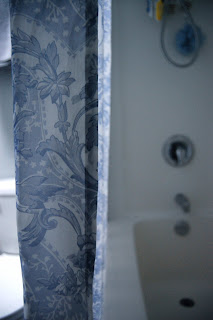
No more vinyl shower curtains!

It's been almost a year since we gave up our vinyl shower curtain. We always had a fabric curtain on the outside with the vinyl on inside because that's just the way it's done, right? Wrong. I mean, it's still done that way, but there's a much easier way. A far less expensive, less wasteful way. Just toss the vinyl curtain. So easy! It's made of non-renewable products, can't be recycled, stinks like crazy, and always, always, always turns a lovely shade of pink mildew, even though they say they won't. You can try to wash it, but it never comes clean. Little bugger.

It took one shower to sway me to the vinyl-free side. I was terrified I was going to step out of the shower and into an ankle-deep puddle on the bathroom floor, but the fabric shower curtain performed like a champ. Now both of our bathrooms sport only fabric shower curtains (one cotton, one polyester) and it's like the vinyl never existed...except for the part where it's sealed in a landfill twenty miles from here and will probably never biodegrade. Major bummer, but now we know better.

Taking care of a fabric shower curtain is simple. After you shower, give it a quick wring to help get rid of some of the water it so valiantly absorbed. Don't leave it bunched up at one end of the shower--spread it the length of the tub so it can drip off the excess water. Half an hour later (or whenever you remember), move it so it's hanging on the outside of the tub--this will allow it to finish drying. Just toss it in the washer every now and then for a quick wash to prevent mildew and hang it to dry. I wash ours once a month with a load of towels. It's that easy.

Added bonus: I've noticed I don't have to clean the tub as often since we gave up the vinyl. That's a victory in itself.


Tuesday, December 14, 2010

Maple Pecan Granola


Makes about 6 cups
Printable version here: click

3 cups rolled oats
1 cup chopped pecans
1 cup slivered almonds
1 cup unsweetened flake coconut
2 Tablespoons brown sugar
2 Tablespoons flaxseed meal
2 Tablespoons wheat germ
1/4 cup canola oil
1/4 cup maple syrup
1 tsp vanilla
3/4 teaspoon salt

Preheat oven to 250 degrees. In a large bowl, mix oats, nuts, brown sugar, flaxseed meal and wheat germ. In a small bowl, mix the oil, syrup, vanilla, and salt until blended (the texture will change and it will be very obvious you have mixed it thoroughly). Pour the oily syrup mixture over the oaty nut mixture and stir until oats are well coated. Divide between two baking sheets and cook for 1 hour and 20 minutes, stirring every 20 minutes to avoid the dreaded nut scorch. Cool thoroughly and store in an airtight container. Eat within 7-10 days.

----------

A few tips...

1. Go for whole pecan halves and roughly chop them yourself. Chopped pecans--or any chopped nuts, for that matter--are nothing more than the nuts that fell apart during processing and there's no guarantee you won't get a chunk of shell. Biting a nutshell is no fun for anyone, but it can be especially miserable for a toddler. Slivered almonds aren't bad, since they are very obviously whole almonds that have been slivered.

2. When you're hunting for maple syrup, grab the Grade B. It's got a burly maple flavor and is often less expensive. Buy it in bulk, if you can, and you'll save even more.

3. Toss in some raisins or other dried fruit while the granola is cooling, if you like. There is a very clear division in our house between the raisin eaters and the raisin haters. I love them, as does the Biggest Girl. Our hero, Mr. Mallard, considers them to be the fruit of the devil. Since we all eat the granola, I leave the raisins out, though I have been known to toss a few dried cranberries in my own bowl.

4. While it is tasty enough to eat by the handful, we make a fast, hearty breakfast out of it by mixing it with some plain yogurt. De-liciousness!

Friday, December 10, 2010

Holiday Bias Tape Table Runner and a Christmas rant

I have exactly no Christmas spirit. In fact, I might even qualify as a Christmas spirit vampire. Mr. Mallard's got a pretty firm grip on the other oar of the USS Grinch, so stepping into our house is like stepping out of the holiday season and into October. Or March.

I'm pretty sure I liked Christmas when I was a kid. Maybe it was working in retail. Maybe it was the restaurants. Maybe it's because I'm not a religious person. Maybe it's because we're mammals and the dead of winter is a time for hibernating. Traveling during the worst weather of the year on intentionally overbooked flights with jacked up prices, the mall, people being trampled to death, dutiful consumers spending money they don't have on things other people don't really need...can't we just mail each other some cards, eat a batch of sugar cookies, and watch some football? In our sweatpants? In our undecked halls? Fa-la-la-la-la-ti-stinkin-da.

Surprising then, isn't it, that I made this...
I was inspired.

Prudent Baby's Bias Tape Table Runner Tutorial was accompanied by the opportunity to win a Simplicity Bias Tape Maker.

I don't have a bias tape maker, so I followed the Carolina Fair Designs Fat Quarter Bias Tape Tutorial and made some of my own. Prudent Baby has a great Bias Tape Tutorial, as well, but I didn't need that much, so I opted for the Fat Quarter option, instead. It was pretty darn simple to do by hand. And way cuter than any store bought bias tape I could find in our neck of the woods.

At 1/4 inch apart, I sewed approximately one million little quilty lines across the runner. Fabulous practice, even if it took a few hours. Oh! I got fancy, too--I did red thread in the bobbin and a pale mint green in the needle. Who knew?! Now both sides have matching thread!

It turned out great.

So festive.

I didn't win the contest, but I did get two amazing things from the project. First, I realized I can do this. I can sew. I can make stuff and it might not be perfect, but I made it. It's more exhilarating than I ever would have imagined. Second, I began coming to terms with the idea of doing something other than baking myself out of my jeans again this holiday season. The Biggest Girl doesn't loathe the holidays and it's not really fair of me to pass on this disdain while she's still such a rookie. If she's really my daughter, she'll grow into it soon enough. In the meantime, I guess I owe it to her to deck a wall or two. Or at least the dining room table.

Wednesday, December 8, 2010

German Meatballs with Egg Noodles

Adapted from The Joy of Cooking
Serves 4-6
Printable recipe here: click

One 1-inch-thick slice of bread
1 pound ground beef, pork, or combination of the two
2 eggs, beaten
1 Tbsp butter
1/4 cup finely chopped onions
1/2 cup panko breadcrumbs
3 Tbsp chopped flat leaf parsley
1 tsp salt
1/4 tsp paprika
1/2 tsp grated (or minced) lemon rind
1 tsp fresh lemon juice
1 tsp Worcestershire sauce
5 cups chicken or vegetable stock

For gravy:
4 Tablespoons butter
1/2 cup flour
2 Tbsp sour cream
2 Tbsp chopped flat leaf parsley

Soak the slice of bread in enough milk to just cover it. Melt the butter and use it to saute the onions until they are golden. Put the stock in a pot with a lid (stockpot or everyday pan would be ideal) and bring it to a boil. While it's coming to a boil, gently wring the milk from the bread and crumble it into a bowl with the eggs, meat, sauteed onions, breadcrumbs, and seasonings. Use your hands to combine the ingredients (do it!). Gently shape the mixture into roughly 2-inch balls and drop them into the boiling stock. Reduce to a hearty simmer and cook, covered, for 15-20 minutes. Remove the meatballs from the stock and set aside.

For the gravy: Add butter and flour to the stock and whisk until smooth. Cook until thick...like gravy. When it's reached a gravy consistency, add sour cream and parsley. Add a little salt and pepper, if you like. Return the meatballs to the pan to reheat.

While the meatballs are cooking and reheating, boil some water and cook your egg noodles according to the directions on the package.

Ladle the meatballs and gravy over a pile of noodles, sprinkle with a few breadcrumbs, and enjoy!

----------

I can't claim this is an authentic recipe, but I can claim it is delicious. I made it with all pork, rather than a combination of pork and beef, and I was thrilled with the result. It's strange to use a words like "silky" and "rich" to describe a meatball, but they really were silky and rich. We had two each and that was plenty. Because it's got such a mellow flavor (and noodles!), it's great for kids. We chose fresh, steamed green beans as a side dish, but any slightly crunchy vegetable would be delightful (steamed broccoli, baked zucchini...cauliflower, maybe?). Even a pile of romaine with a simple vinaigrette would be great. It took about 45 minutes to make, but I'm guessing I could whip it up in less than thirty minutes the second time around.

Now I just need to find a tasty German dessert to round out the meal...

Monday, December 6, 2010

Sewing bender!

A few months ago (or a year...time flies), I bought a sewing machine and made some little curtains. I then proceeded to abandon that trusty little machine, along with the fancy scissors and Project Runway aspirations that accompanied its purchase. When it got cold here last month and I realized the Biggest Girl was going to freeze her tootsies off if we didn't get some cozier bedding, I decided to dust off the sewing machine and just make some sheets. How tough can it be?

I'll tell you: it's not tough at all. It's ridiculously easy, in fact. I followed the Crib Sheet Tutorial from the Michael Miller Fabrics Blog for the bottom part of the sheet and the Top Sheet Tutorial at Whipstitch for the top of the sheet. Two yards of fabric for each sheet--on sale--brings these bad boys in at about $10-12 each. They could have been even less expensive, but I splurged on fancy flannel at a local quilting shop that has a dangerously exciting sale section.

XOXOXO, The Cat by Wendy Slotboom

Day Dreams from the Just Dreamy collection

The babies are particularly fond of this sheet.

I was feeling like a total badass, so I made a fitted sheet, as well. It's folded neatly on the shelf in the Biggest Girl's closet right now, though, and since I'm not nearly ninja enough to sneak into the room of a napping toddler, open the closet, grab the sheet, and escape undetected, you'll just have to trust me when I tell you that it is a masterpiece sculpted of blue polka dot flannel.

After conquering the sheets, I boldly moved on to bigger (smaller, actually), more exciting things. Like flannel pajama pants!
I used Simplicity pattern 8493 and some snowman fabric I found at Joann Fabrics. The most nerve-wracking part of these little pj pants was cutting the pattern--something I had never done before. After I face my pattern cutting fears, they went together so easily that I'm already plotting to get Mr. Mallard and the Biggest Girl in matching jammies by Christmas.

I'm on a roll! I don't know if they sprinkle crack on the fabric or if there's something genuinely therapeutic about the monotonous hum of the sewing machine, but I can't seem to stop. There's more to this sewing bender--specifically an awesome holiday table runner--but it will have to wait. I hear the dishwasher running, but I do not hear the toys in the living room putting themselves back where they belong, so I need to go have a word with them.

LinkWithin

Related Posts with Thumbnails